Building the 175 Guitar Kit From FretWire: Part I
I'm building a guitar! I've got the bug. We've all heard someone talk about building a guitar, or we've wandered past the stewmac.com website and thought, "hmmm....maybe...". Well, I'm wondering no more.
This is part of an ongoing series as I build a 175-style guitar from TheFretWire.com:
- Building the 175 Guitar Kit From FretWire: Part I
- Building the 175 Guitar Kit: Part II
- Next Up: Part III, the Finishing Schedule
I recently got a kit from The Fret Wire. The Fret Wire offers beginner guitar kits - everything from a Stratocaster style to archtops, and even a dobro-style guitar.
I've got the ES-175 kit because I love acoustic guitars, and I love jazz, and the ES-175 felt like the perfect intersection of those two things.
About the ES-175
For the curious minds, the "ES" in "ES-175" (or ES-335, or any of Gibson's other ES- guitars) stands for "Electric Spanish", as opposed to "Hawaiian style" guitar playing, implying you hold the guitar upright as opposed to lying it flat on your lap.
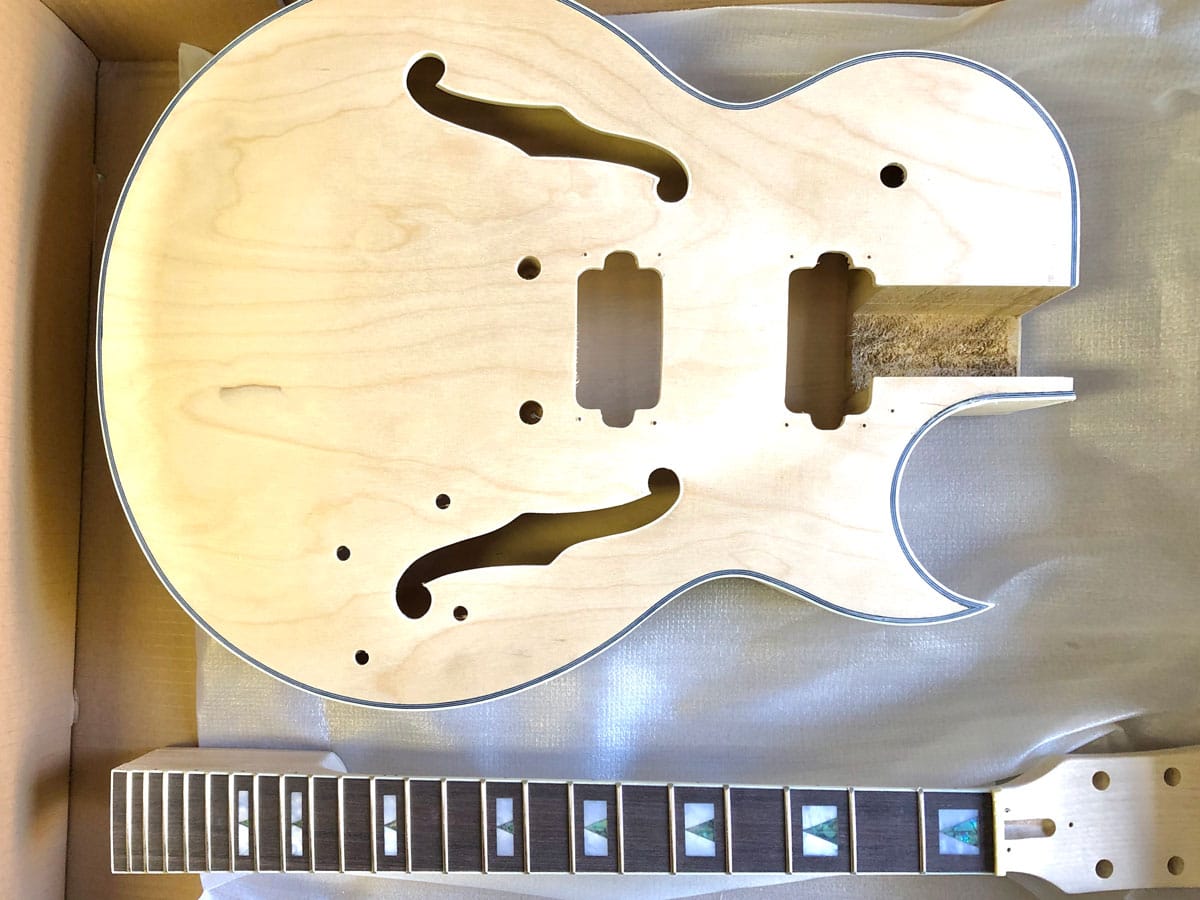
The ES-175 is a Gibson model which debuted in 1949, and is typically associated with jazz. It's completely hollow, and has a florentine cutaway, two humbuckers, and a floating bridge. The most popular pictures of it usually show it with a sunburst finish.

Ordering a DIY Guitar Kit
The Fret Wire kits are beginner kits. This means that the bodies already come shaped, the neck has been sized and fitted, and all the necessary components are included.

They have a lot of different style kits: Strat, Tele, Thinline, 335, Hollow body, lap steel, double-neck, left-handed... a lot.
Even though the kits come pre-set, each of them have upgrade options for pickups, tuners, and components (only on some kits). The stock parts that come standard with the kit are ok and playable, but many people have noted that you should upgrade the pickups and hardware if you intend to play the guitar out.
With all these options, it's worth asking yourself two questions before you shop:
- What style of guitar do you want to build?
- What do you want to do with it? i.e. Do you want to play it with a band? Or just have fun putting it together?
With those questions answered, you can quickly find the kit you want and have confidence you're ordering something worth your time.
What's In The Fret Wire ES-175 Kit


Fretwire's ES-175 kit includes:
- Body
- Neck
- Tailpiece
- Wire (colors will vary)
- Pickup Mounting Screws (8) Truss Rod Cover Screws (3)
- Ground Wire
- Pickups (2)
- Strings
- Truss Rod Cover
- Strap Knobs
- Output Jack
- Output Cable
- Allen Wrench for Truss Rod
- Tuner Washers and Ferrules
- Tuners (6)
- Pots, Washers and nuts
- Knobs
- Tone Capacitors
- Pickguard Mounting Hardware
- Bridge posts
- Bridge
- Switch
- Tuner Set Screws (6)
- Strap knob screws (2)
- Strap knob rubber washers
The ES-175 Kit is available on www.thefretwire.com for $200.
How To Build the Kit
The Fret Wire provides insructions on putting the kit together. They don't, however, provide much instruction on staining and finishing the guitar. You're expected to do some of your own research, find your own supplies, and have your own plan.
I've spent some time researching options, and mentally walking through the process.
Here's my analysis of what I'll need, and the basic process I'll follow for this beginner level guitar kit build.
Build Stage 1: Staining/Finishing the Guitar
The Fret Wire doesn't provide finishing materials (Note: they do provide fingerboard conditioner for the fretboard, but that's it). They also don't provide instructions. So this took some extra research.
The best help I found on doing basic finishing of a guitar was on Guitarkitworld.com. This article in particular covers a simple finishing process for newbies (like me).
They have additional articles on sanding techniques, wood-grain filler, and doing a sunburst finish - but that article describes the main process.
For the neck, I am following a separate guideline that utilizes gun stock stain and wax to provide.a silky feel to the neck. I'm essentially following this article from the Zzounds blog.

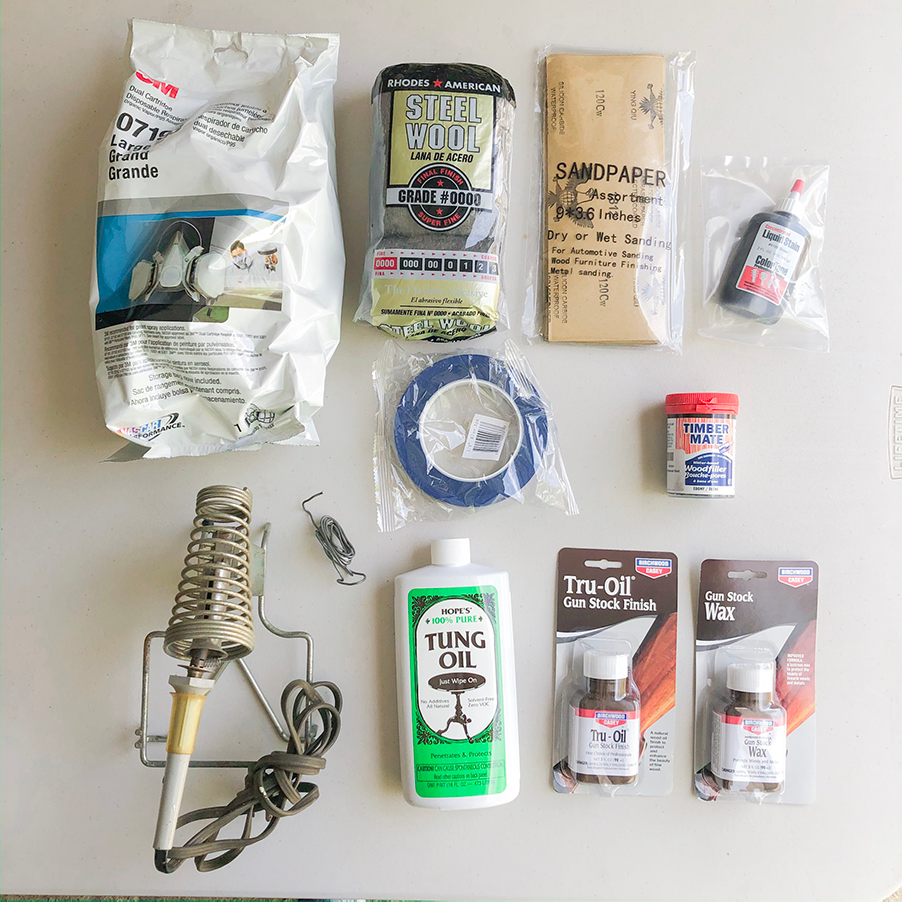
Additional materials I had to purchase (and this is probably the absolute minimum possible to finish the guitar):
- 28 Pieces 120 to 3000 Grit Wet Dry Sandpaper ($7.99)
- Birchwood Casey Gun Stock Wax, 3 oz. ($6.99)
- Birchwood Casey Tru-Oil Stock Finish 3 Ounce ($6.99)
- 3 pk 1/4" inch x 60yd STIKK Blue Painters Tape ($8.97)
- Timbermate Rustic Ebony Hardwood Wood Filler 8oz Jar ($9.99)
- HOPE'S 100% Tung Oil 16 oz-Pt, Green, 16 Fl Oz ($14.74)
- 3M Dual Cartridge Respirator Assembly ($19.64)
- Steel Wool, 12 pad, Super Fine Grade #0000, Rhodes American, Final Finish ($3.31)
- Old Soldering Iron and Solder (Borrowed!)
Finishing a guitar takes several weeks. The wood body of the guitar must be sanded, stained, finished, and polished - with frequent sandings between each stage to ensure there are no defects. The process is long because best practice is to wait for each layer to dry before sanding and proceeding to the next step. Many guides recommend waiting a full week between the final finish application and the final polish, to ensure the finish has set completely solid.

Build Stage 2: Assembling the Guitar
Once the guitar body and neck are finished, you can assemble the guitar. The neck is joined to the body of the guitar using wood glue. The tuning pegs are inserted and screwed in. In the case of the ES-175, we can put together the floating bridge assembly.

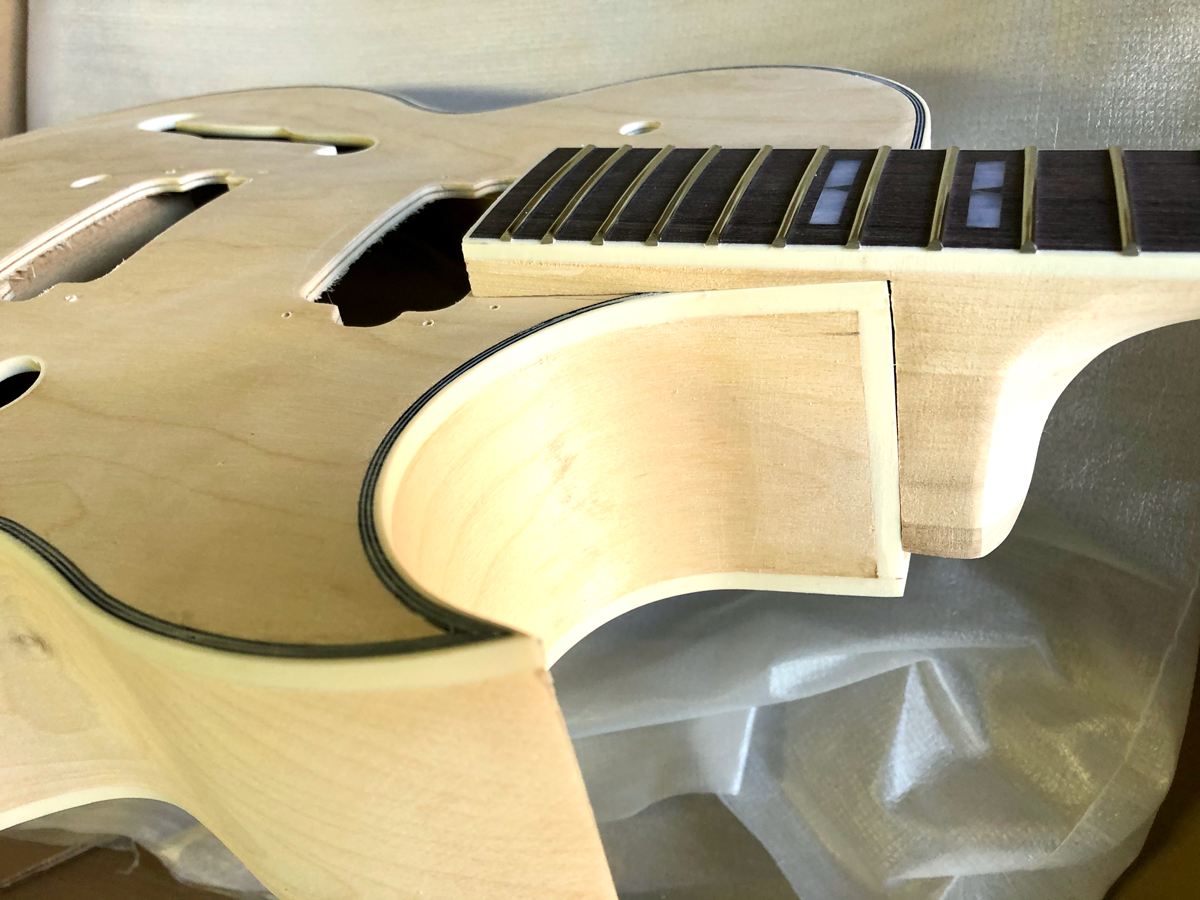
You actually want to test out your assembly BEFORE you stain and finish the guitar. The reason is that you often have to sand some areas to make the pieces fit tightly, particularly the neck and the body joint. You don't want to have to re-sand a part of your finish job that you've just polished to perfection! So it's recommended to do a dry run on the assembly first and sand as necessary to ensure a tight fit. Then, when you get to this stage, everything should fit snugly.
Build Stage 3: Wiring the Electronics
The pickups, knobs, and switches need to be wired now. On a typical electric guitar, you can wire all this and install through the panel in the back.
On an ES-175, though, it's trickier. There's no access panel in the back of the guitar. You have to do all your soldering and wiring outside the guitar, with the wires run through the f-holes. Then you use dental floss or a fine piece of string to run in through the knob holes and out through the f-holes, so you can pull the potentiometers into the body of the guitar and up through the correct hole, permanently fixing them in place with nuts.
If you think this sounds complicated, then...yes, so do I. I'm a little nervous about getting to this part, so I'll definitely be scrutinizing that video from The Fret Wire to try and make the process smooth.
Next Steps: Setting Up A Schedule
The next step is to set up a schedule for the different steps: sanding, finishing, polishing, etc. I want to map out a calendar schedule so that I can have a clear vision of how much time this will take, and when I can expect to be holding my new homemade ax.
I don't think this going to take a series of all-day blocks of time to complete. Instead, I imagine this is going to be a long series of 1-2 hour blocks spread out strategically over the next month.
Conclusion
I'm very excited and looking forward to starting this project up!
I'm also looking forward to documenting the process here. So look forward to updates as I move through the build.
So far, the project cost is $200 for the kit from the The Fret Wire, and then about $100 of extra parts for the staining and finishing parts listed above. I'll add updates to cost and supplies as I encounter them.
If you have any questions or suggestions, please put them in the comments below! If you've worked on these types of beginner kits, please add any tips or wisdom in the comments also.
